Vote Bot: Create a Voting Bot Without Coding
Learn how to create a voting bot without coding using Automatio.ai
Vote Bot: Create a Voting Bot Without Coding
Learn how to create a voting bot without coding using Automatio.ai. This guide helps you automate votes for online polls and contests. Use pre-built templates, schedule automated voting, and export results in formats like CSV, JSON, or API.

Originally published on Automatio blog
Introduction
Looking to automate votes for an online poll or contest? With a vote bot, you can easily automate the entire process, saving time and effort while increasing your chances of success.
In this tutorial, you will learn how to create a voting bot without writing any code, using Automatio.ai and it’s simple, user-friendly interface. Let’s dive in and get your voting bot up and running!
What is a Voting Bot?
A voting bot is a tool that automates the process of voting in various online activities. Whether you’re supporting a friend in a contest, participating in a poll, or managing multiple votes in a survey, a voting bot handles the repetitive tasks for you.
There are various types of voting bots:
Basic Bots: Handle simple tasks like filling out forms and submitting votes.
Advanced Bots: Manage multiple accounts or rotate IP addresses to keep things running smoothly.
With platforms like Automatio, setting up your voting bot is straightforward and user-friendly, even if you don’t have coding knowledge.
Common Uses for Voting Bots
Voting bots can be handy for several online activities where votes are needed. Here are some common scenarios:
Online Polls and Surveys: Automate the voting process and gather responses quickly.
Contests and Competitions: Participate in multiple rounds of voting to increase your chances of winning.
Social Media Polls: Engage with polls on platforms like Instagram and X (formerly Twitter).
Marketing Promotions: Boost your chances in promotional contests and giveaways.
Popularity Contests: Influence competitions like music charts or award polls.
Audience Engagement: Enhance engagement in online communities and forums.
Remember, automated voting bots can be a game-changer, but it’s crucial to exercise ethical practices and comply with the rules and guidelines set by the platforms hosting these activities. Use the power of automation responsibly and maximize your chances of success!
Set Up Your Voting Bot
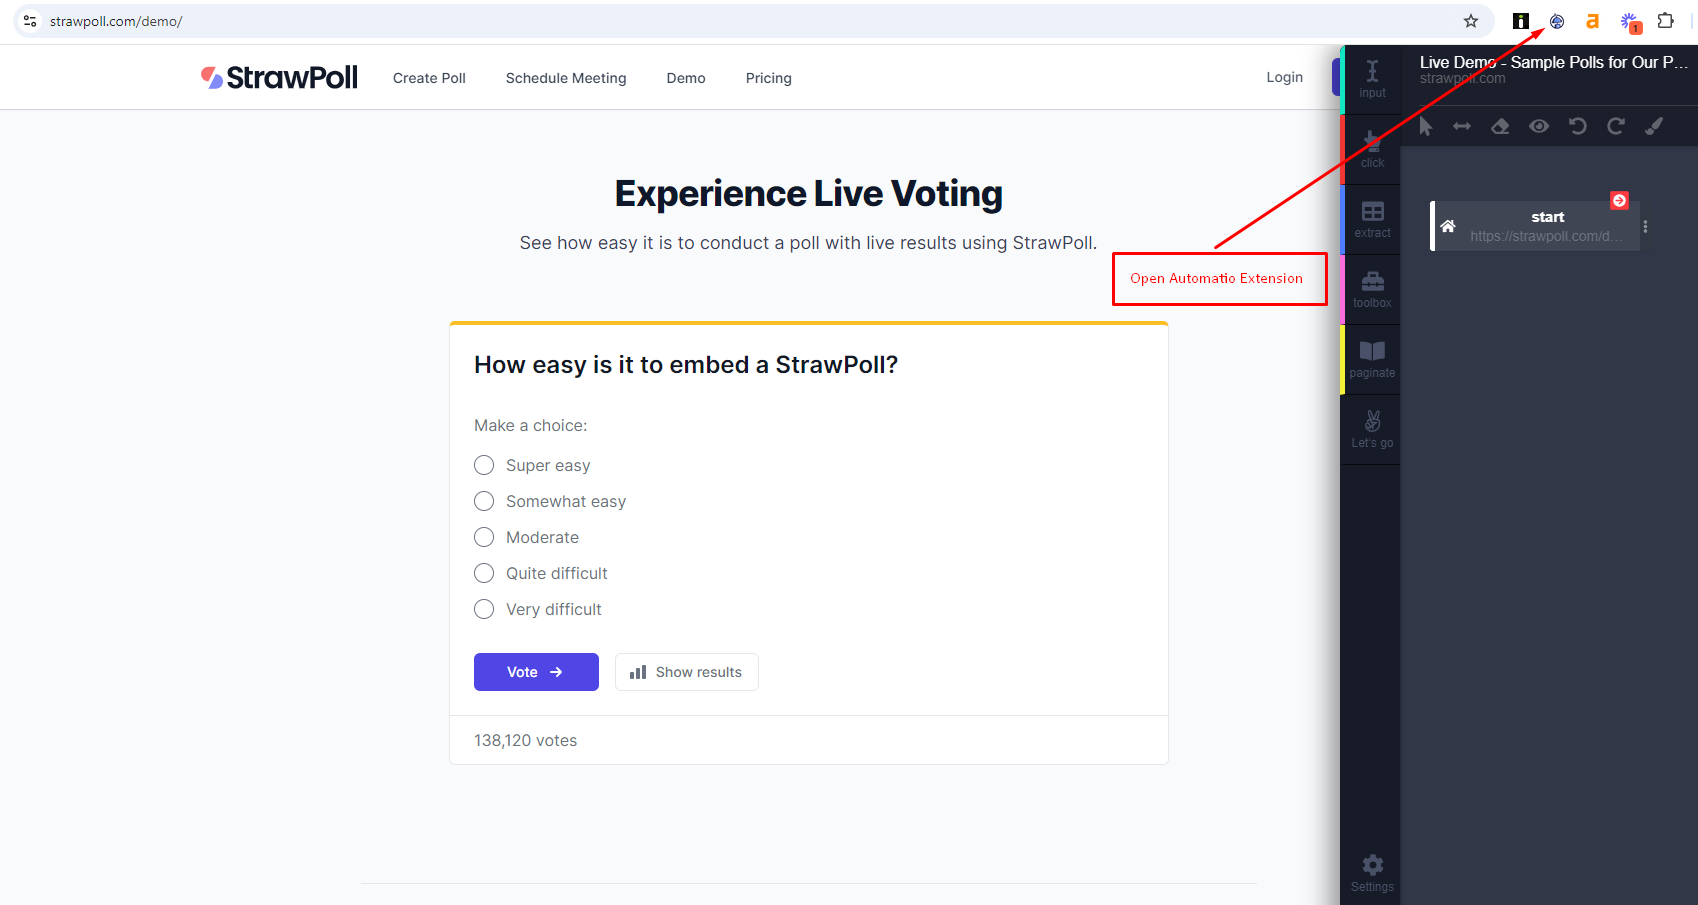
For this guide, we’ll use a Strawpoll demo page as our example. Follow these steps to set up your voting bot:
- Open the poll page you want to vote on. Launch the Automatio Chrome extension, which will automatically pick up the URL of the page you’re on. No extra configuration is needed!
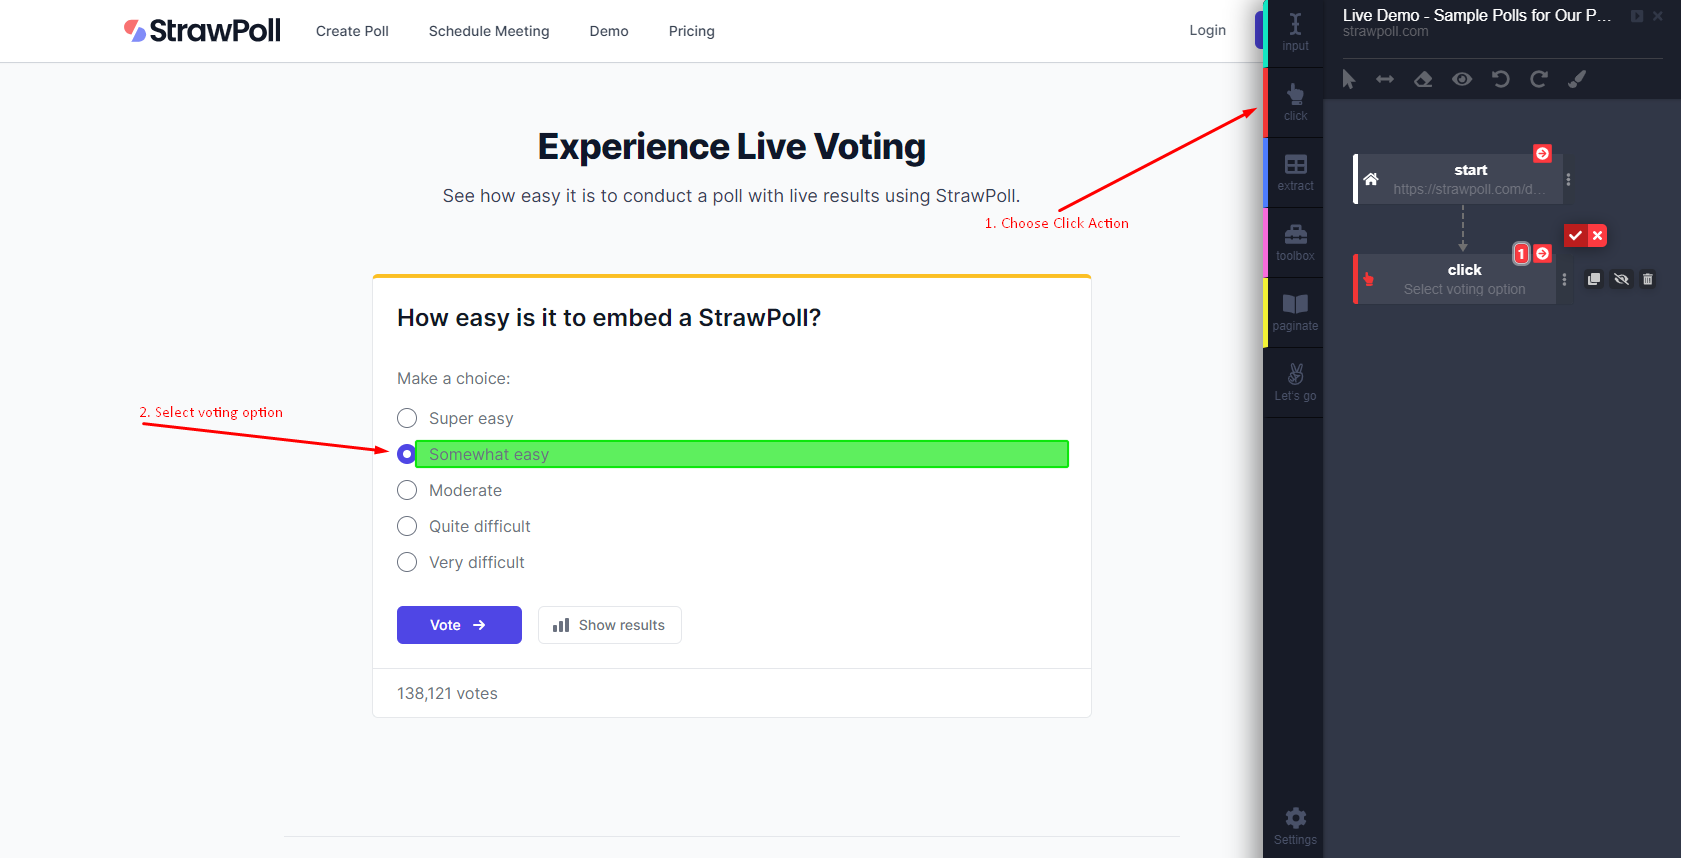
- Set up your bot to choose a voting option. Create a click action to target and select your desired option.
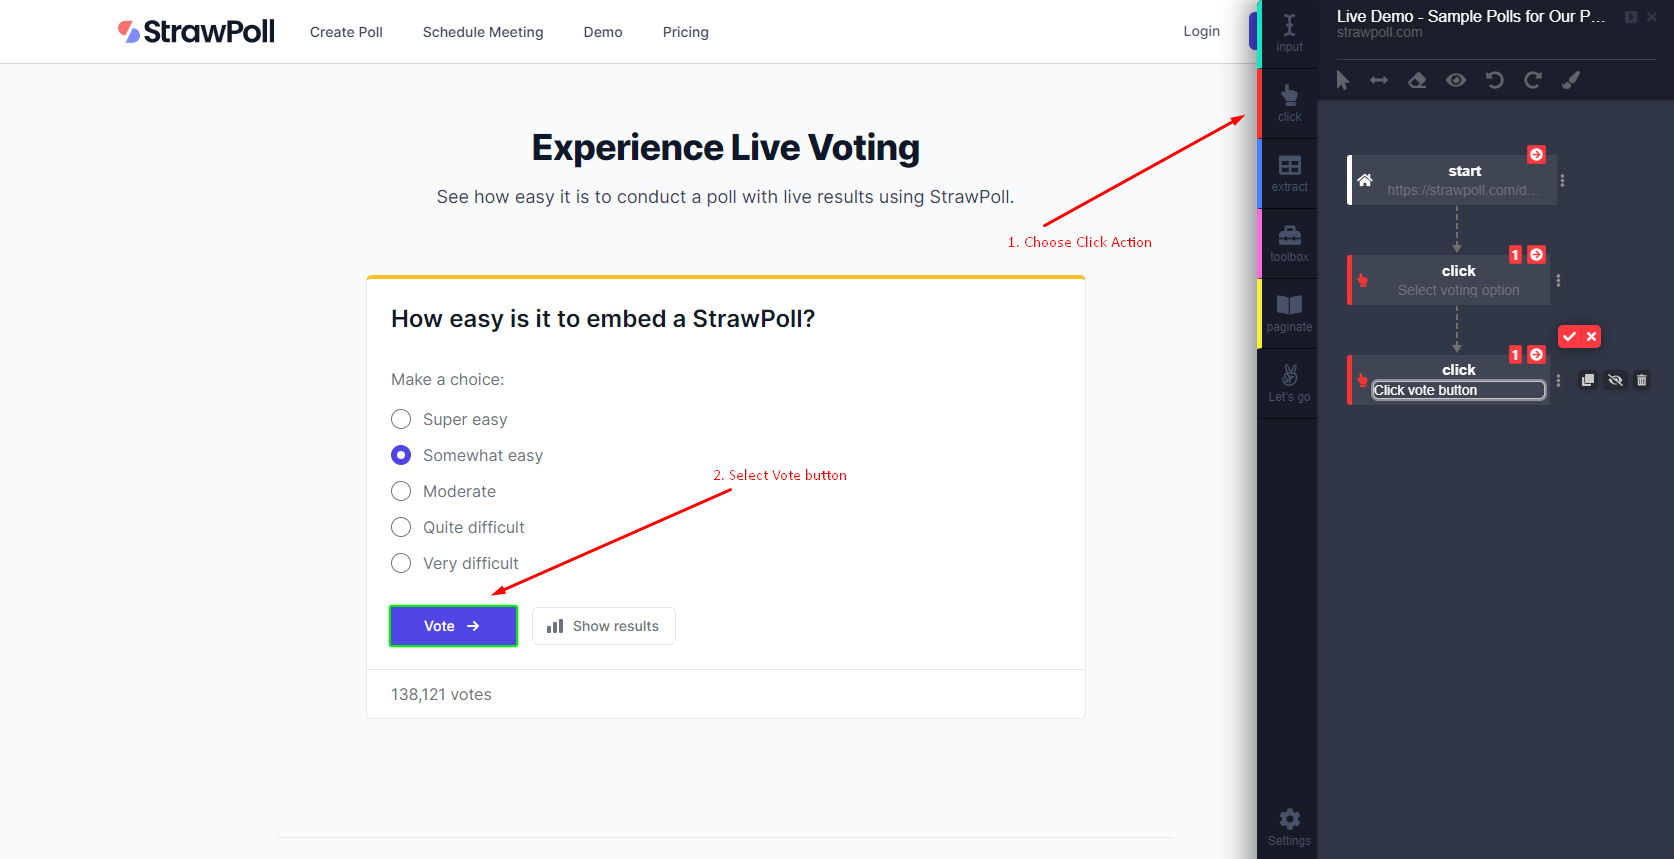
Create another click action for the “Vote” button to finalize and submit your vote.
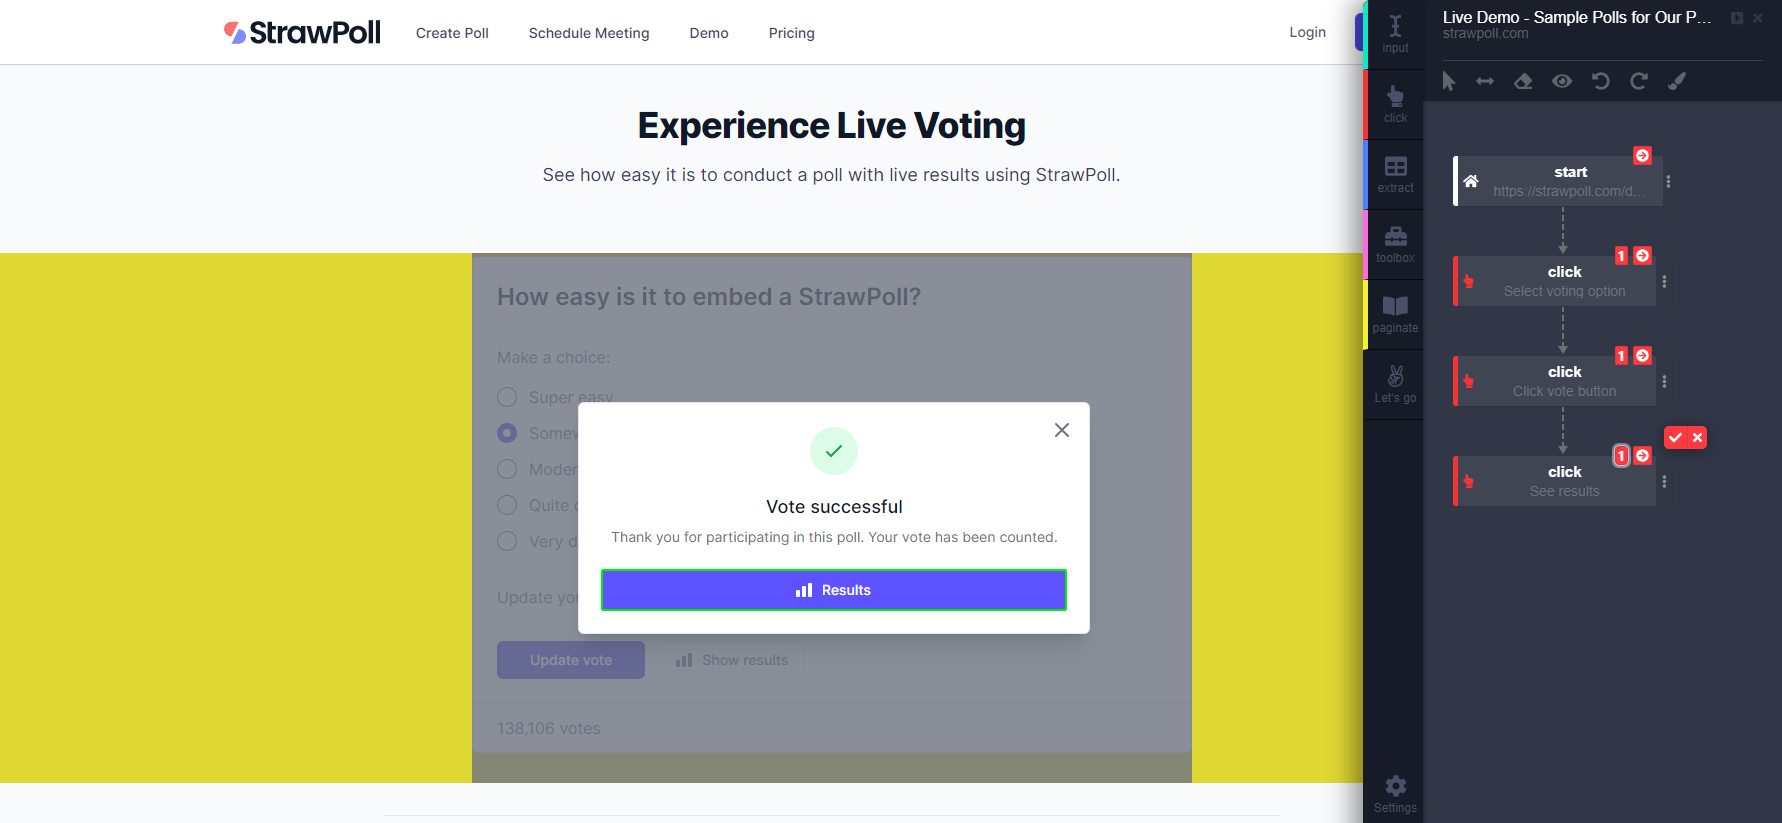
- After voting, a popup will appear asking if you want to see the results. Create a click action to handle this popup and click the “Results” button to display the poll results.
Extract Poll Results
To get the most out of your voting bot, you can extract the results from the poll.
First, set up an extract action to grab the poll title from the top of the results page. This action will provide you with the name of the poll you’re examining.
Next, use another extract action to capture the total number of votes displayed on the results page. This tells you how many votes were cast in the entire poll.
For a detailed view, create an extract action for each poll option title. This will show you the different choices available in the poll.
Finally, set up an extract action to gather the number of votes each option received. Make sure to capture both the numeric counts and percentages to get a complete picture of how each option performed.
Check out this short video below 👇
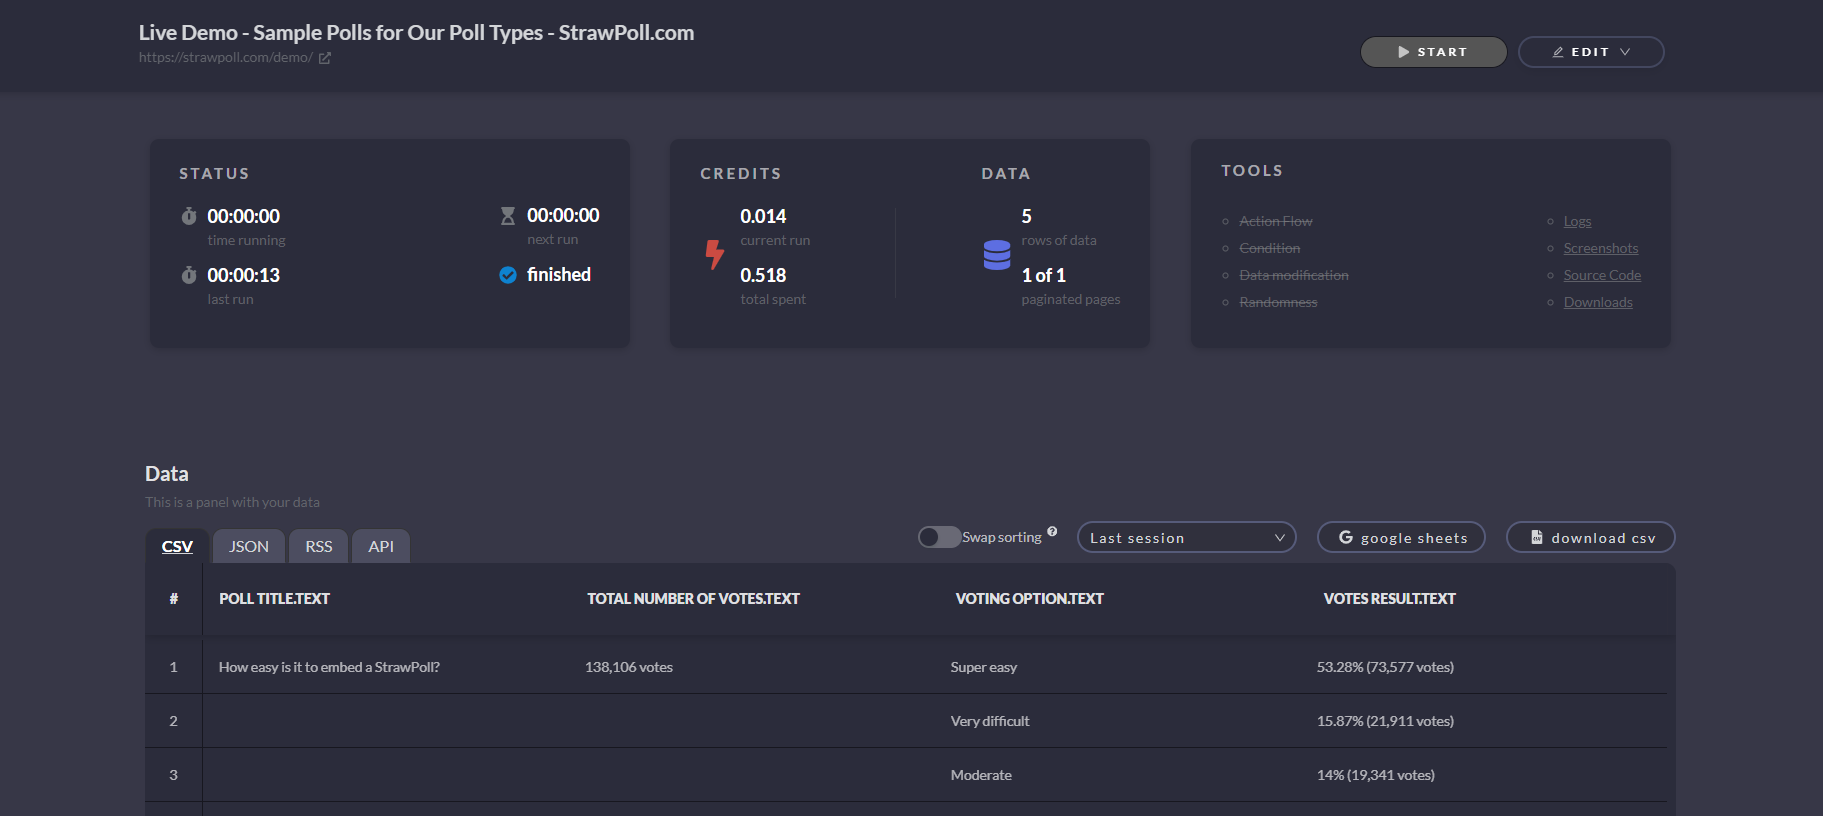
After setting up these actions, you can access and manage all extracted data right from the Automatio dashboard. You have the option to export the data in formats like CSV, JSON, and API. Automatio also offers direct Google Sheets integration, making it easy to organize and analyze your results. For other tools, the API gives you the flexibility to connect and work seamlessly across different platforms.
Scheduling Your Voting Bot
With your voting bot now successfully submitting votes, the next step is to schedule it to automate the process further. By setting up a schedule, you can ensure your bot continues voting at regular intervals without any manual input. This will allow your bot to keep working efficiently, using different IPs and proxies if necessary. Let’s see how to set up this automatic schedule and maximize your voting efforts!
Open Extra Options: Click the three dots next to the start action to access additional settings.
Choose the Trigger Option: Select Trigger from the menu to set how often the bot should cast votes.
Set the Time Interval: Enter “5” to have the bot vote every 5 minutes, or adjust to your preference.
Pick Your Time Unit: Choose “minutes,” “hours,” or “days” from the dropdown based on how frequently you want the bot to vote.
Here is the process shown in the video 👇
Pre-Built Templates: Quick Start with Voting Bots
Besides building a bot from scratch, Automatio also offers pre-built templates for various tasks, including voting.
For example, our Poll.fm Bot template is designed for voting on Poll.fm (Crowdsignal). Just change the poll URL in the start action, make another adjustment if needed, and let the template handle the rest.
Final Thoughts
Vote bots are handy tools that make voting easier and faster. They can help you with online contests, social media polls, and surveys by doing the voting work for you. This means you can vote more times and increase your chances of winning or getting noticed.
Using vote bots saves you time and lets you focus on other important tasks. Just remember to use vote bots responsibly and follow the rules of the websites you are voting on.
